 Main
Main Site Map
 Blog
Blog Calendar
 Gallery
 Site Traffic
 Site Health
> /Daniel/Tools/Yard/SLTX1050/mods/HeadlightSwitchindex.php
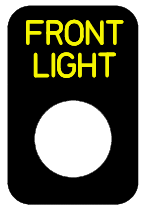
I am using an Apem IPR1SAD4LOS pushbutton connected to a 20A relay. The button is labelled by installing it in a small panel I designed and had cut, engraved and filled by Front Panel Express.

Mouser
-
Part Description P/N Qty. Unit Price Total Apem IPR1SAD5-LOS Latching pushbutton, yellow plunger, red LED IPR1SAD5-LOS 1 $21.22 $21.22 AMP 794894-1 Sealed Mini Universal Mate-N-Lok plug, 2-position 794894-1 2 $0.58 $1.16 AMP 794896-1 Sealed Mini Universal Mate-N-Lok cap, 2-position 794896-1 2 $0.69 $1.38 AMP 794772-2 Sealed Mini Universal Mate-N-Lok interface seal, 2-position 794772-2 2 $0.45 $0.90 AMP 794805-1 Sealed Mini Universal Mate-N-Lok plug, 4-position 794805-1 2 $0.63 $1.26 AMP 794939-1 Sealed Mini Universal Mate-N-Lok cap, 4-position 794939-1 2 $0.67 $1.34 AMP 794772-4 Sealed Mini Universal Mate-N-Lok interface seal, 4-position 794772-4 2 $0.50 $1.00 AMP 794758-1 Sealed Mini Universal Mate-N-Lok cavity wire seal 794758-1 24 $0.15 $3.60 171638-1 Mini Universal Mate-N-Lok pin, 20-16AWG, tin 171638-1 12 $0.12 $1.44 171639-1 Mini Universal Mate-N-Lok socket, 20-16AWG, tin 171639-1 12 $0.08 $0.96 Total $34.26
Easter Beaver
-
Part Description P/N Qty. Unit Price Total 20A micro relay 20A micro relay with tab 20A micro relay 1 $6.49 $6.49 socket for micro relay socket for micro relay micro relay socket 1 $1.75 $1.75 Total $8.24
Front Panel Express
-
Part Description P/N Qty. Unit Price Total button label panel headlight button label panel 1 $20.00 $20.00 Total $20.00
Grand Total
-
Mouser $34.26 Easter Beaver $8.24 Front Panel Express $20.00 Total $62.50
Diary
- August 14, 2010
-
I mounted the headlight relay near the right-side headlight, using the
existing grill mounting bolt. I may or may not leave it here, I'm not
sure how strong the relay mounting tab is (it flexes pretty easily). If
it has problems, I'll Dremel off the mounting tab and use VHB tape to mount
the relay on the headlight housing.

I crimped and soldered receptacles on the pushbutton end of the headlight harness, and inserted them into the AMP sealed Mini Universal Mate-N-Lok shell.
I did all of the crimping and splicing for the relay bases near the right-side headlight, and plugged the base into the relay.

I soldered wires and the LED resistor to the headlight pushbutton, then crimped on the pins.
I installed the headlight button, then put the pins from the pushbutton into the AMP shell.


I plugged it into the shell that leads to the relay and headlight, and tested things. All is well; when I push the button to close its switch, the relay closes, the headlights come on and the pushbutton's LED lights up. I'm only running 10mA through the LED (it's rated for 20mA), but it's visible in daylight.

-
I mounted the headlight relay near the right-side headlight, using the
existing grill mounting bolt. I may or may not leave it here, I'm not
sure how strong the relay mounting tab is (it flexes pretty easily). If
it has problems, I'll Dremel off the mounting tab and use VHB tape to mount
the relay on the headlight housing.
- August 11, 2010
- I ran the harness wires for the headlight switch through the existing split loom for the headlights, then up behind the fuel tank. I used Halar braided sleeve for abrasion protection.
- August 9, 2010
-
The button panels arrived from
Front Panel Express.
The dimensions are exact. I test-fitted them in the indicator panel,
they look nice.


-
The button panels arrived from
Front Panel Express.
The dimensions are exact. I test-fitted them in the indicator panel,
they look nice.
- August 7, 2010
- I drilled the holes for the pushbuttons in the instrument panel, and tested fitment of the Apem IP pushbuttons. Fitment is fine, I'll put harnesses on the pushbuttons and install the label panels on Monday. The nut for the pushbuttons is 14mm, but I suspect I'll snug them down with a small crescent wrench since I don't want to mess up the harnesses.
- August 6, 2010
- The #796 halogen bulbs arrived. They have a warning on the box to not use them in plastic sockets. However, they don't draw that much more current than the original 25W bulbs; 2.7 amps versus 1.9 amps. Given that I'll only be using them in the winter when snowthrowing, I'm not overly concerned about the heat at the moment.
- August 4, 2010
- I ordered four #796 halogen bulbs from Amazon for $6.43 each.
- August 3, 2010
-
I still need to order some wire, and some resistors for the LEDs in the
pushbuttons. I'd prefer wire that's good for at least 105C, if not higher.
The relays, relay bases and fuseholders arrived from Eastern Beaver.


-
I still need to order some wire, and some resistors for the LEDs in the
pushbuttons. I'd prefer wire that's good for at least 105C, if not higher.
- August 2, 2010
- The button panels for the headlights and hydro cooling shipped from Front Panel Express today. They should arrive on August 9, 2010.
- July 29, 2010
- The relays, relay bases and fuseholders shipped from Eastern Beaver.
- July 26, 2010
-
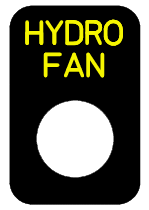
I ordered the button panels for the headlight button and the hydro fan
button from Front Panel
Express. I don't expect them to be here for at least 2 weeks; I used
the cheapest service (7 business days) and the cheapest delivery
(UPS Ground).
-
I ordered the button panels for the headlight button and the hydro fan
button from Front Panel
Express. I don't expect them to be here for at least 2 weeks; I used
the cheapest service (7 business days) and the cheapest delivery
(UPS Ground).
- July 25, 2010
-
I created label panels in Front Panel Designer. They're 23mm x 35mm.
The pricing for 1 is about $20. That's with 1.5mm aluminum, black
anodizing and filled engraving. I can fit 2 of them on the display panel,
and 3 more between the steering column and display panel.
I ordered relays, relay bases and fuse holders from Eastern Beaver.
-
I created label panels in Front Panel Designer. They're 23mm x 35mm.
The pricing for 1 is about $20. That's with 1.5mm aluminum, black
anodizing and filled engraving. I can fit 2 of them on the display panel,
and 3 more between the steering column and display panel.
- July 23, 2010
- I poked at Front Panel Designer a bit to see what it'll cost to have aluminum panels made to identify pushbuttons. I need to do a real design with actual dimensions, but the price looks to be reasonable.
- July 22, 2010
-
The Mouser order with the IPR1SAD5-LOS pushbutton arrived. The picture
on the left is the pushbuttons, the picture on the right is the Tyco/AMP
sealed Mini Mate-N-Lok 4-pole connectors.


-
The Mouser order with the IPR1SAD5-LOS pushbutton arrived. The picture
on the left is the pushbuttons, the picture on the right is the Tyco/AMP
sealed Mini Mate-N-Lok 4-pole connectors.
- July 19, 2010
- The Mouser order with the IPR1SAD5-LOS pushbutton should arrive on Thursday 7/22/2010.
- July 17, 2010
- I ordered some of the parts from Mouser. They didn't have the 2-position connectors in stock, so I left those off of my order and will get them elsewhere.
- July 10, 2010
- I started creating the parts list for the headlight switch mod.